Sitebulb allows you to configure the crawler to collect additional, custom data points as it crawls (in addition to all the 'normal' data like h1, title tag, meta description etc...).
We have a separate guide in the documentation which covers the basic process for adding content extractors - so if this is new to you, please head there first. This guide assumes you know the basics about setting up content extraction in Sitebulb, and covers some of the more advanced use cases.
This guide covers the more advanced settings options for content extraction, including several examples.
You can jump to a specific area of the guide using the jumplinks below:
As you should already be aware, Sitebulb offers a point-and-click method for selecting a CSS selector:

However, you don't need to use this method. You could re-write or adjust the selector yourself, or simply write a completely new one.
Here is a quick example of rewriting a selector from our homepage. All I have done is switch from grabbing a single element within a content block, to grabbing the entire block. You can see how the visual selector and 'test' results change as you re-write the selector:
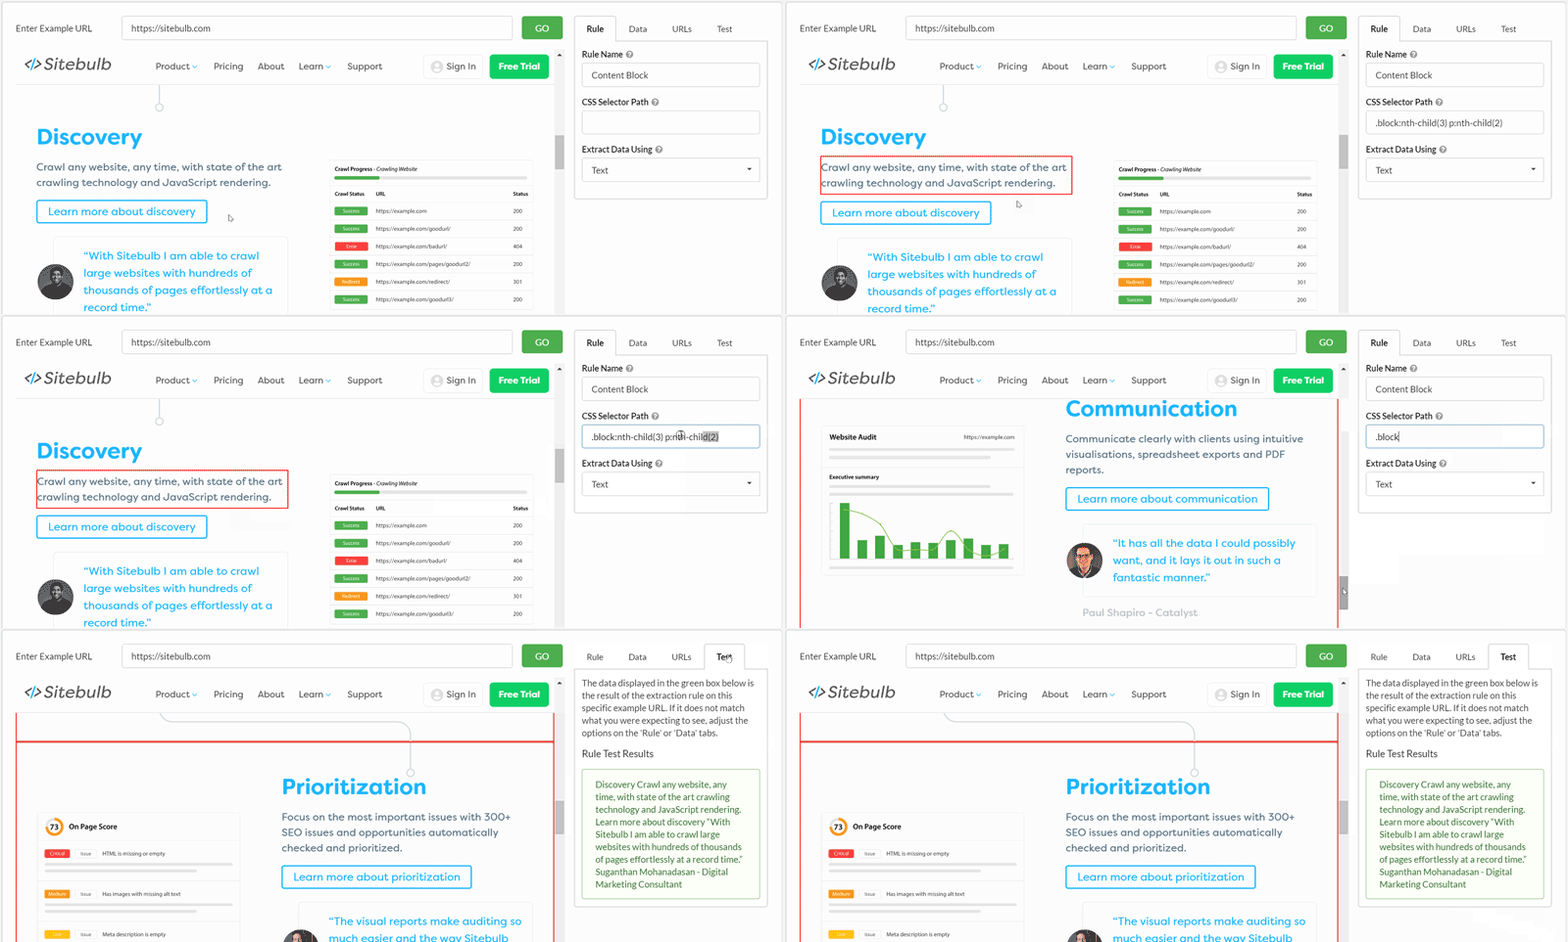
We'll use this same technique in some of the examples below.
You may also find that the point-and-click method ends up choosing a selector that is too specific. As an example, the following selector can be used to grab the phone number off this directory page:
div.row-spaced:nth-child(1) > div:nth-child(2) > div:nth-child(1) > ul:nth-child(2) > li:nth-child(2) > span:nth-child(2)

However, you can extract the same datapoint with a much simpler selector:

You may find that if the selector is too specific, it will change from page to page. This means that it may extract the data on the example URL you test it with, but not on any of the other URLs you want to scrape. So you may need to adjust the selector to make it more robust.
You can test the selector by trying different example URLs and checking if the selector and/or the test results change.
If you are familiar with content extraction on other tools, you are probably also familiar with using Chrome DevTools (or Firefox) and the 'Inspect Element' feature in order to find CSS selectors:
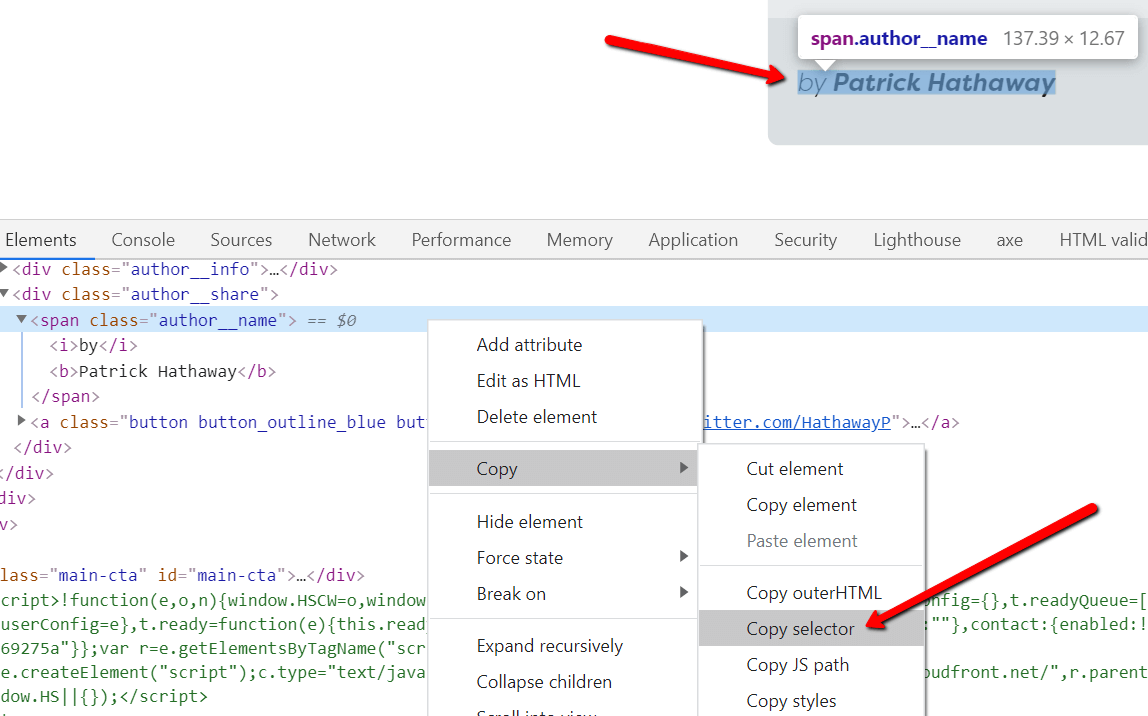
For visual elements, this method is often not better than Sitebulb's point-and-click method, however it does enable you to identify selectors that represent elements which are not visible on the page (e.g. tracking codes or meta data).
Developing a better understanding of CSS selectors will help you figure out the correct selector to use, Mozilla have a decent primer as a starting point.
When setting up your rules, the default 'Text' option is great if you want to scrape...erm...text.
But sometimes you might not want text.
Selecting from the dropdown 'Extract Data Using' gives a variety of different options for what you can extract.
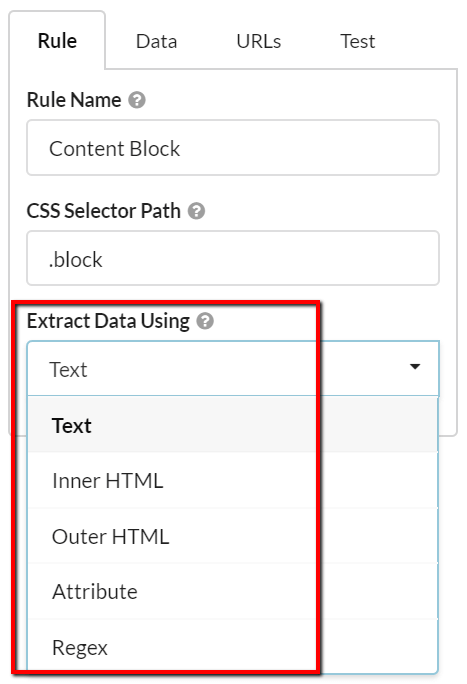
In this section we will examine the options for 'Inner HTML' and 'Outer HTML'. These options allow you to grab all the HTML content within the selector, which you might want to do if you were trying to grab code snippets (e.g. tracking widgets).
Typically, this would fall more under 'developer work' than 'SEO work', and you'd expect to do some post-processing of the data following the extraction.
This option extracts the HTML content within the selector, including any other HTML elements.
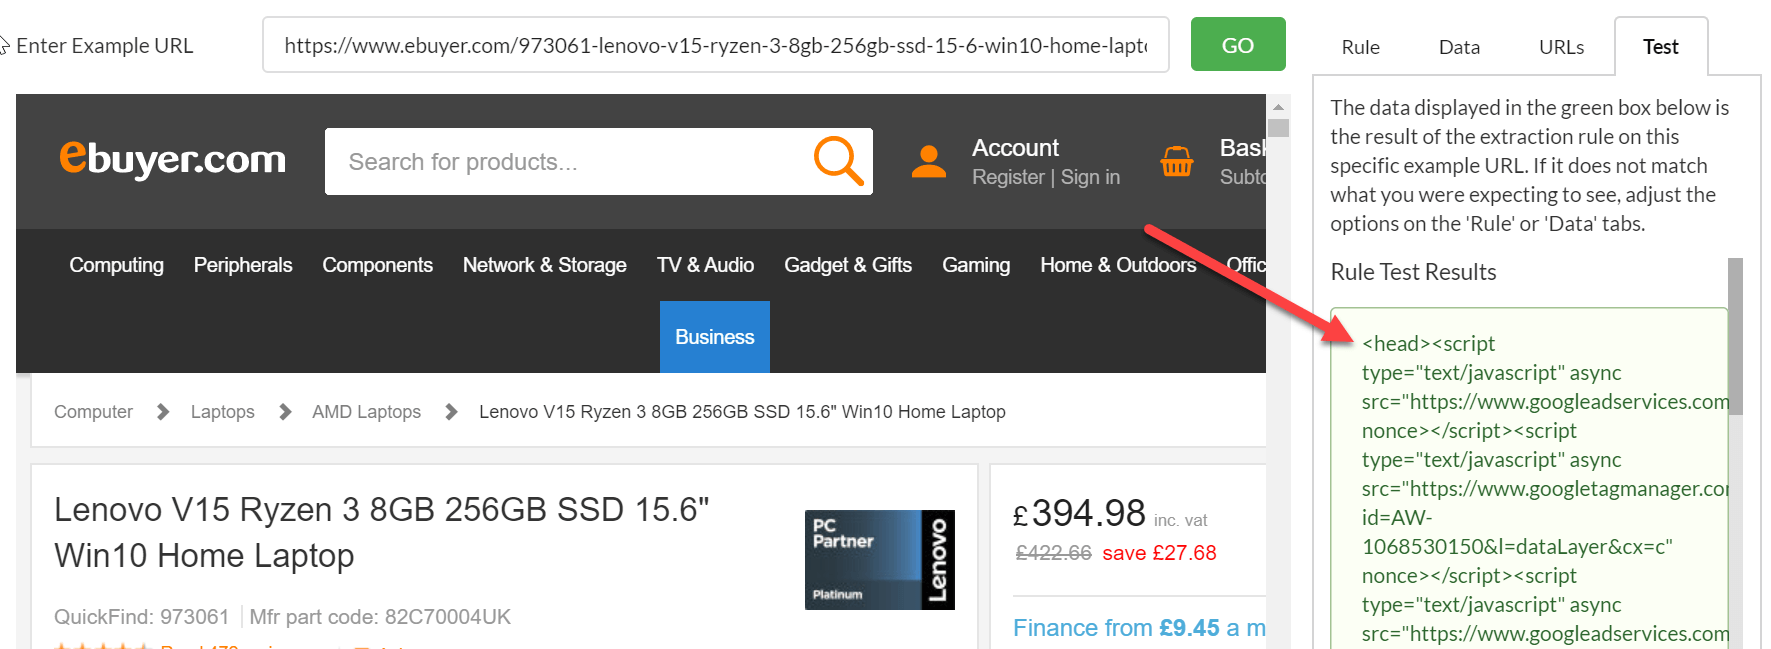
Let's say we just wanted to extract all the HTML content in the <head>, we could re-write the CSS selector (see section above) simply to 'head' and use the Inner HTML option to extract the HTML content:

This option extracts the selected element in full along with the HTML content inside, which can allow you to pull out extra data that would have been otherwise unavailable. In some circumstances you may find you can get what you want with Inner HTML, but in others you may need Outer HTML.
If we look at exactly the same example as above, only this time with Outer HTML selected, you can see that on this occasion, the only extra 'outer' HTML is <head> itself.
When we return to our dropdown, the fourth available option is 'Attribute', and choosing this prompts another box to appear, requiring you to enter the attribute name.
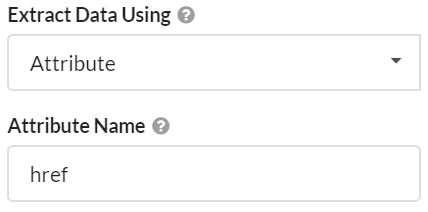
Let's say I had a list of blog posts and I wanted to collect the URL of the hero image for each one. The attribute option would be perfect for this. Simply load in a blog post URL, use the point-and-click CSS selector for the hero image, then enter 'src' as the attribute to scrape.
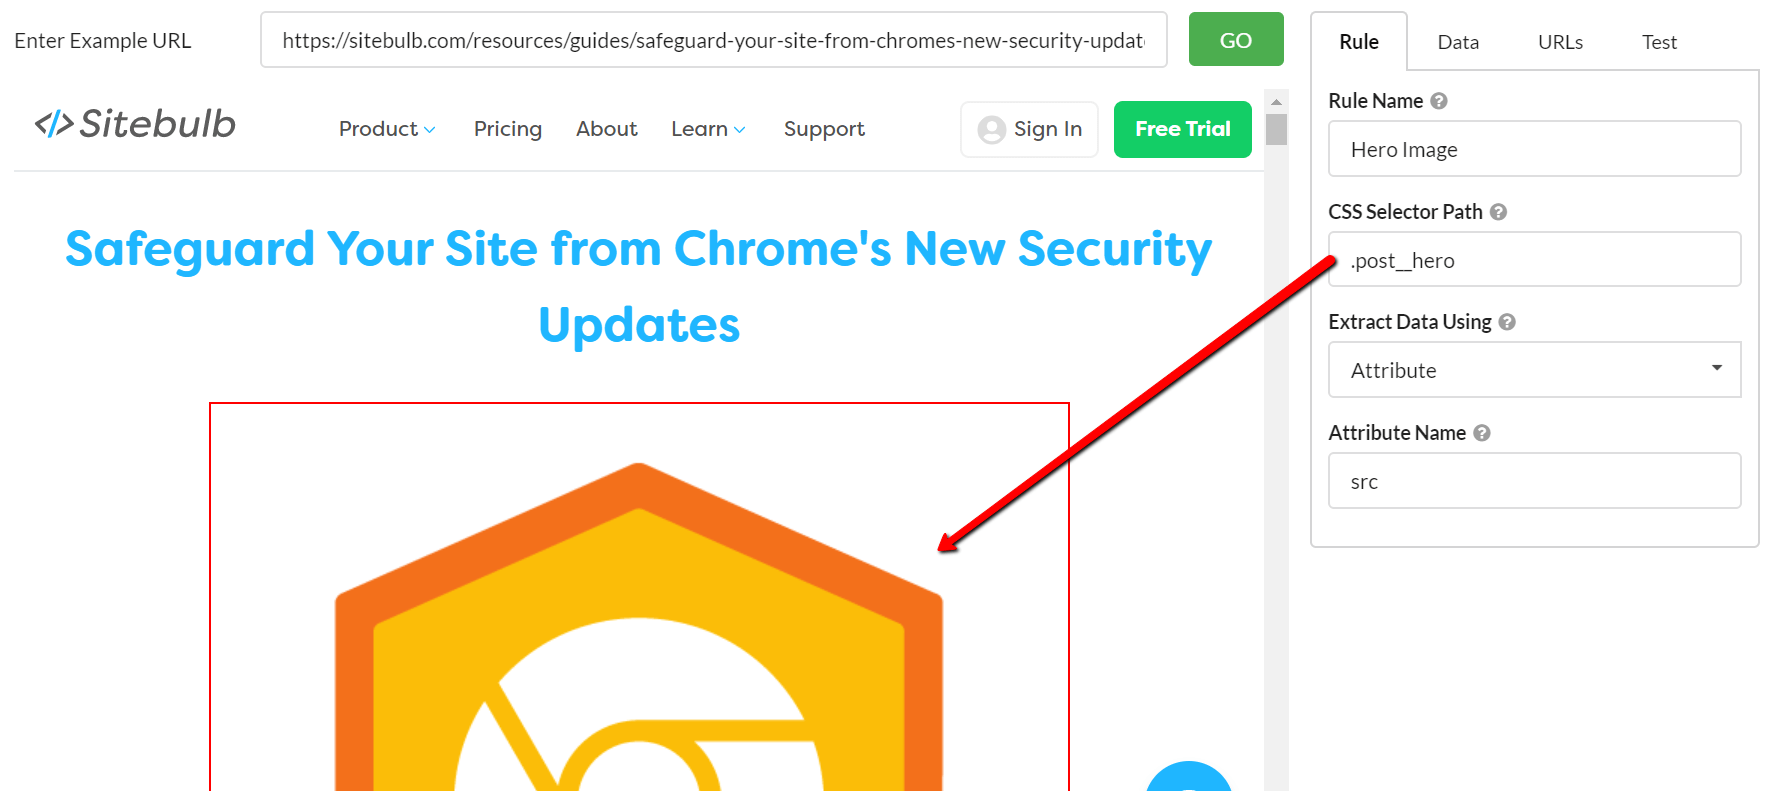
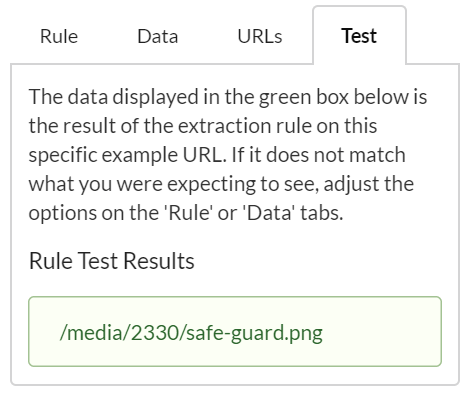
As always, the 'test' tab helps ensure that you are grabbing the right data.
The final option from our dropdown is regex. Regex stands for 'regular expression', which is a sequence of characters that define a search pattern. Regex can be a very versatile and powerful option, but it is both difficult to understand and difficult to learn.
Fortunately, there are enough other extraction options built into the content extractor to mean that you should be able to avoid using regex for almost everything. Leaving the regex option for advanced users who already know how to write it...
Sitebulb offers a couple of unique options to make your regex matching easier and more powerful:
Instead of the typical offering that most tools give you, 'Regex OR CSS', Sitebulb instead offers 'Regex within a CSS path'. This means you can define the CSS selector as usual, and apply the regex just to this sub-section of the HTML. This means you don't need to pattern-match across the entire HTML of the page, which makes it easier to write the regex and saves computer resources to boot.
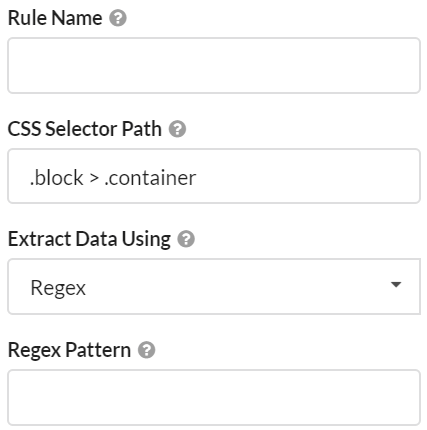
For example, suppose I was auditing the NY Times website, and wanted to scrape some meta data like the article publish date. Since I know this will be located in the <head>, I don't need to search the entire HTML document, and can just specify 'head' in the CSS selector column, then add my regex pattern:
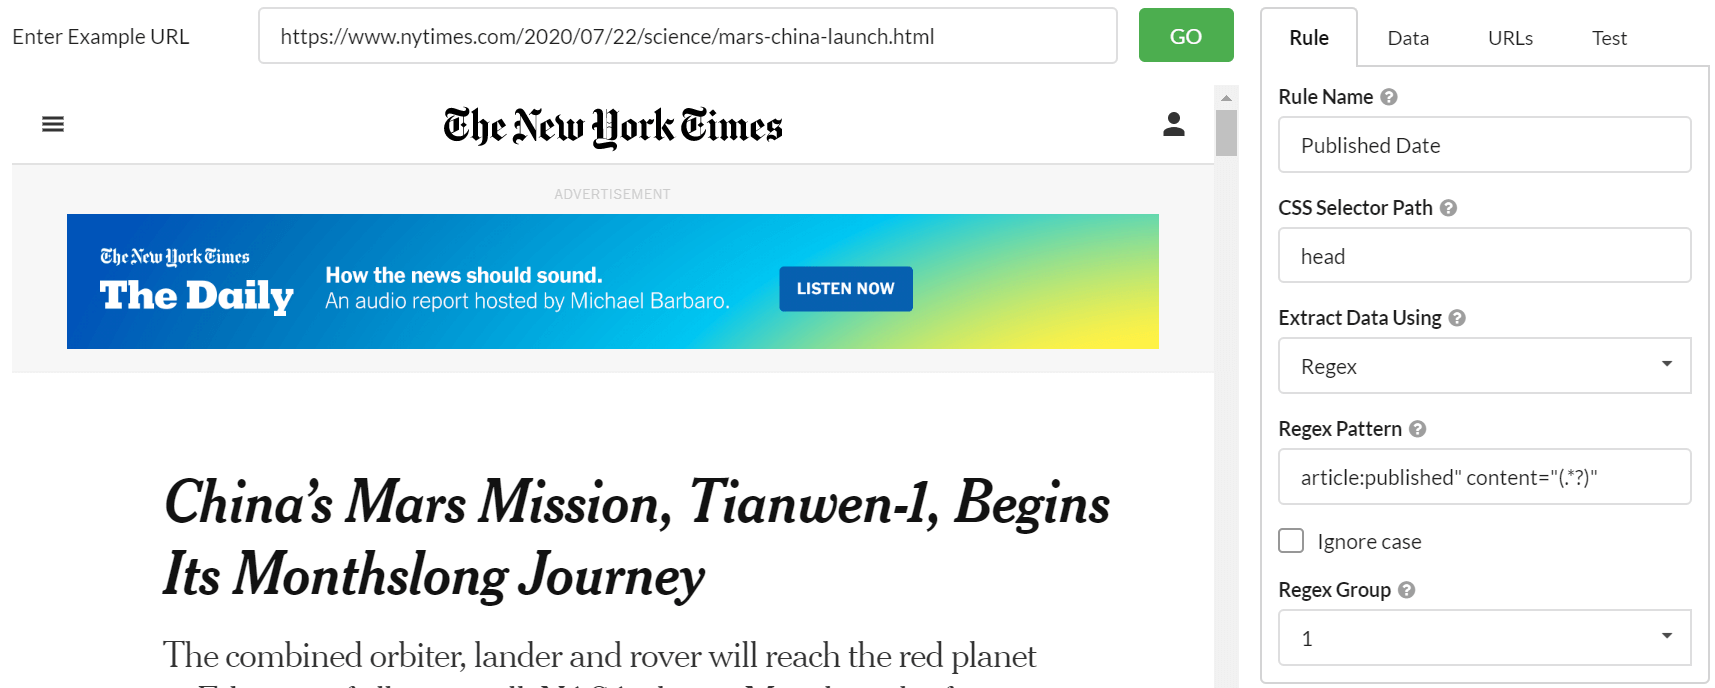
By making use of groups in your regex statement, you can more specifically define the data you want to pull from the page.
When writing a regex pattern, you can make use of parentheses to group part of the regular expression together. By using parentheses, this creates a numbered capturing group - it stores the part of the string matched by the part of the regular expression inside the parentheses.
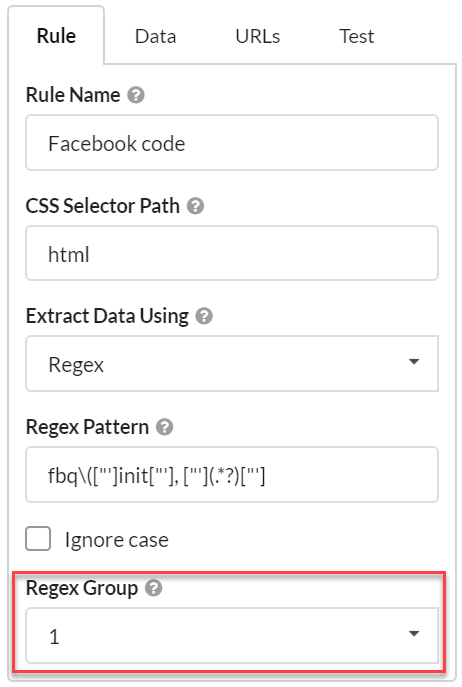
Let's look at an example. We could use the regex pattern fbq\(["']init["'], ["'](.*?)["'] to extract the Facebook tracking pixel.
We could search the entire HTML for this, but since we know it lives in the <head>, we can just add this as the CSS path and save asking Sitebulb to do extra work (which, at the end of the day, uses up more of your computer resources).
![]()
The Regex Group in the list allows you to select which group you want to extract. In the example above, the default value of 0 returns the full match, which is perhaps not formatted exactly as you want it:
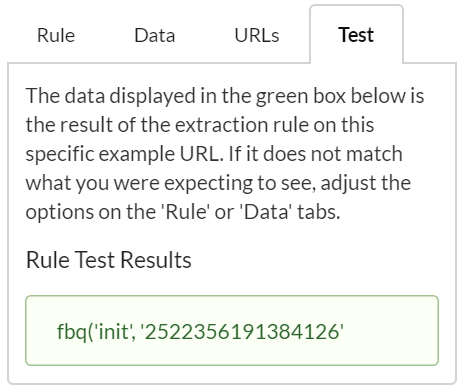
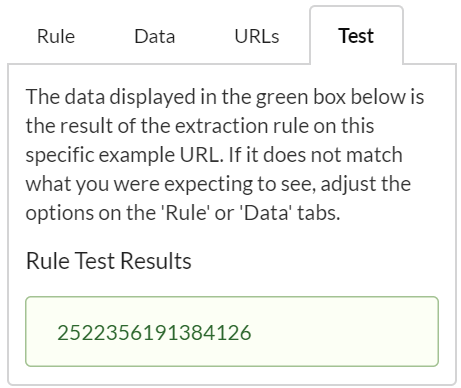
In this case, all we really want is the number portion, so to pull the data out more cleanly we need to choose the regex group of 1. Changing the regex group to 1 switches the pattern match to index 1, which only returns the contents of the first parenthesis:
And this just picks out the number, as we wanted:
Note: The most important thing to realise here is that Sitebulb works slightly differently to other tools, and you can't just copy/paste regex patterns from random guides off the internet and expect them to work exactly the same with Sitebulb. Other tools, for instance, will select group 1 by default, and not give you the flexibility to select other groups yourself.
In addition to the normal extraction options covered above, Sitebulb can also be configured to intelligently extract data with a range of in-built presets.
To access these, navigate to the Data tab, where there are two further dropdowns.
By default, Sitebulb will extract the first matched item, even if there are multiple matches within the content area.
You can instruct Sitebulb to perform alternative operations using this dropdown:
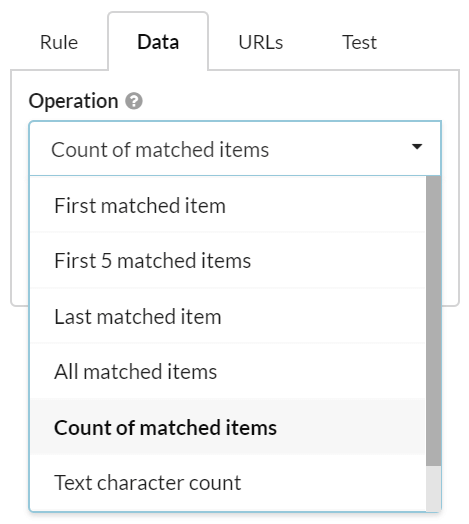
These options allow you to do the following:
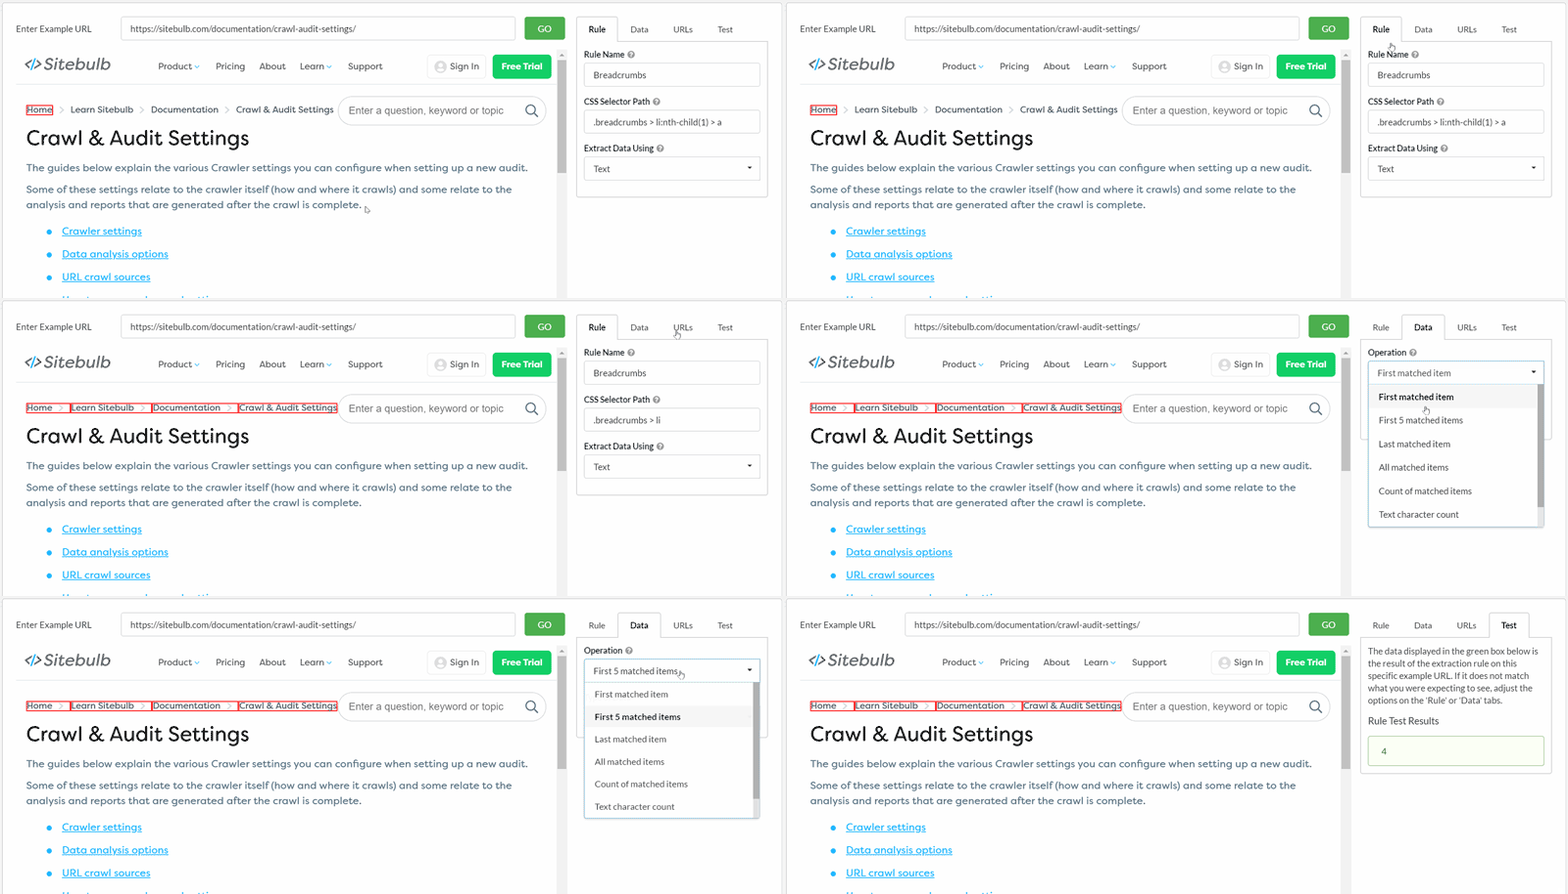
See how adjusting the CSS selector and the operation option can affect the data you extract:
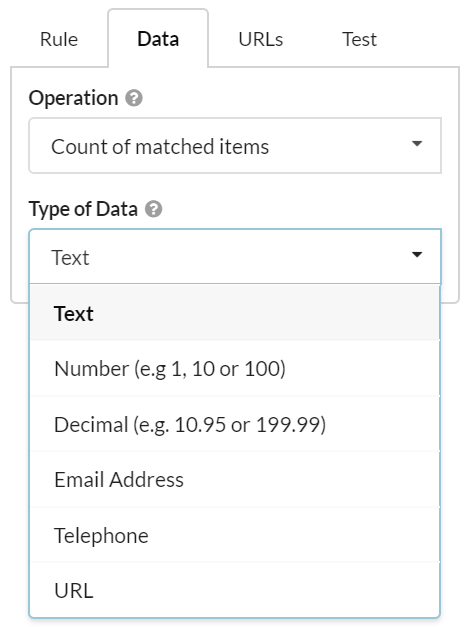
By default, Sitebulb will extract a data type of 'Text', as this is most often the type of data that users are after.
By using this dropdown, however, you are able to select different options for more specific use-cases.
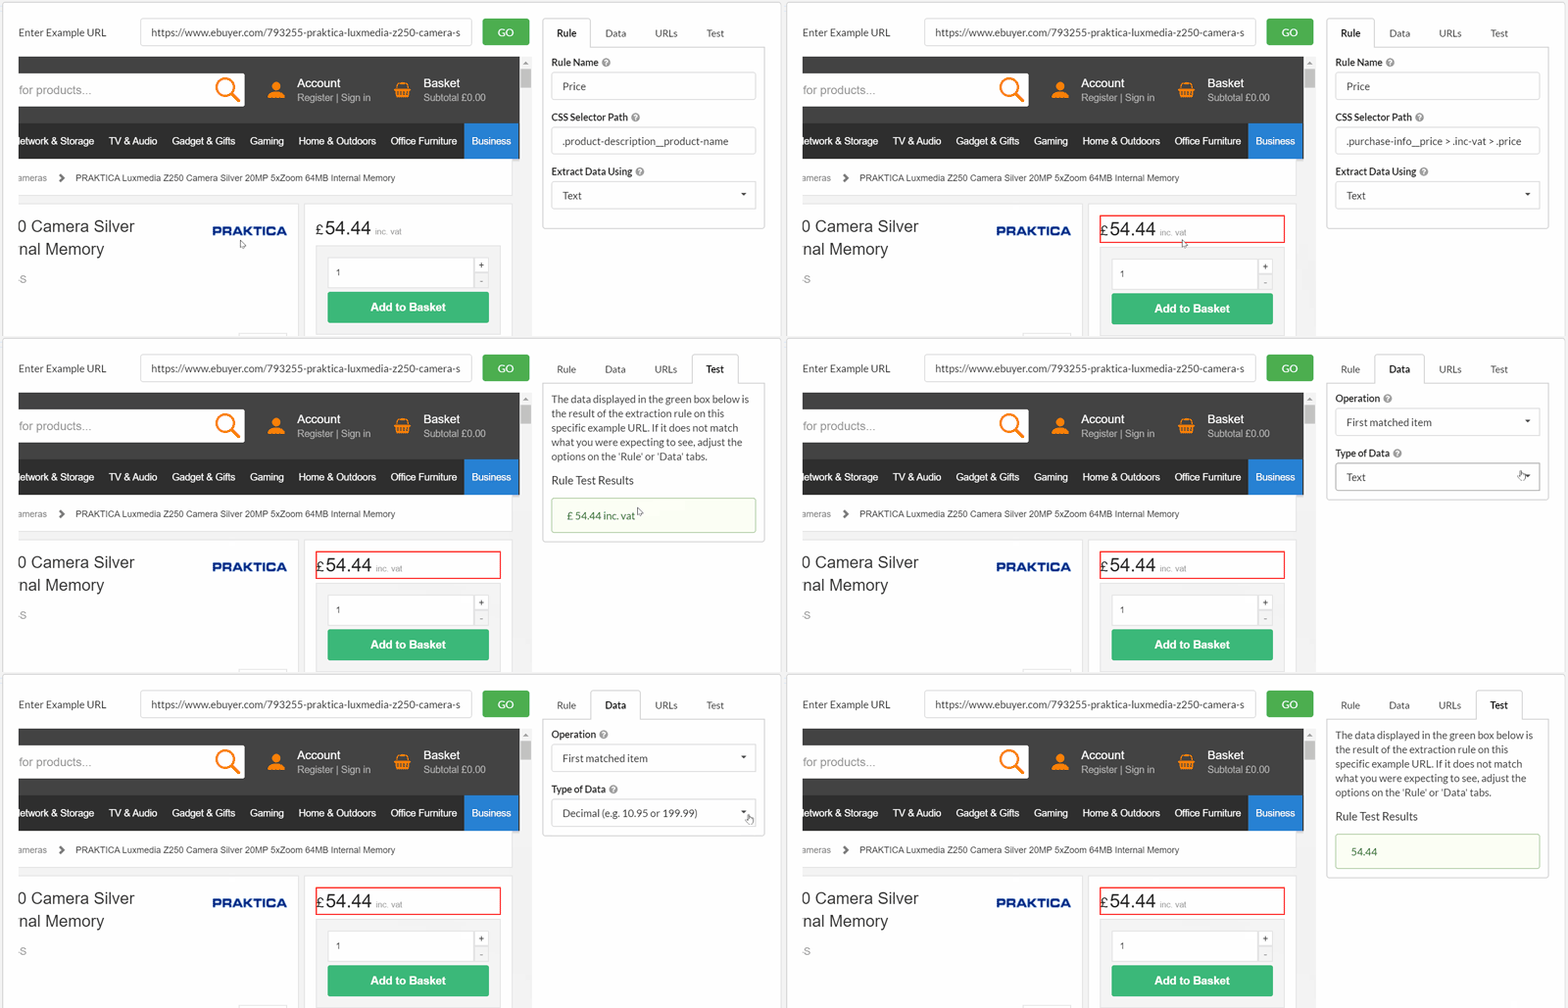
Consider a typical ecommerce store, where you might wish to extract the price from each product page. By selecting 'Decimal' from the dropdown, you can specify to collect the data in the format which is most useful to you.
Similarly, you can instruct Sitebulb you just pick out the number from the selected element.
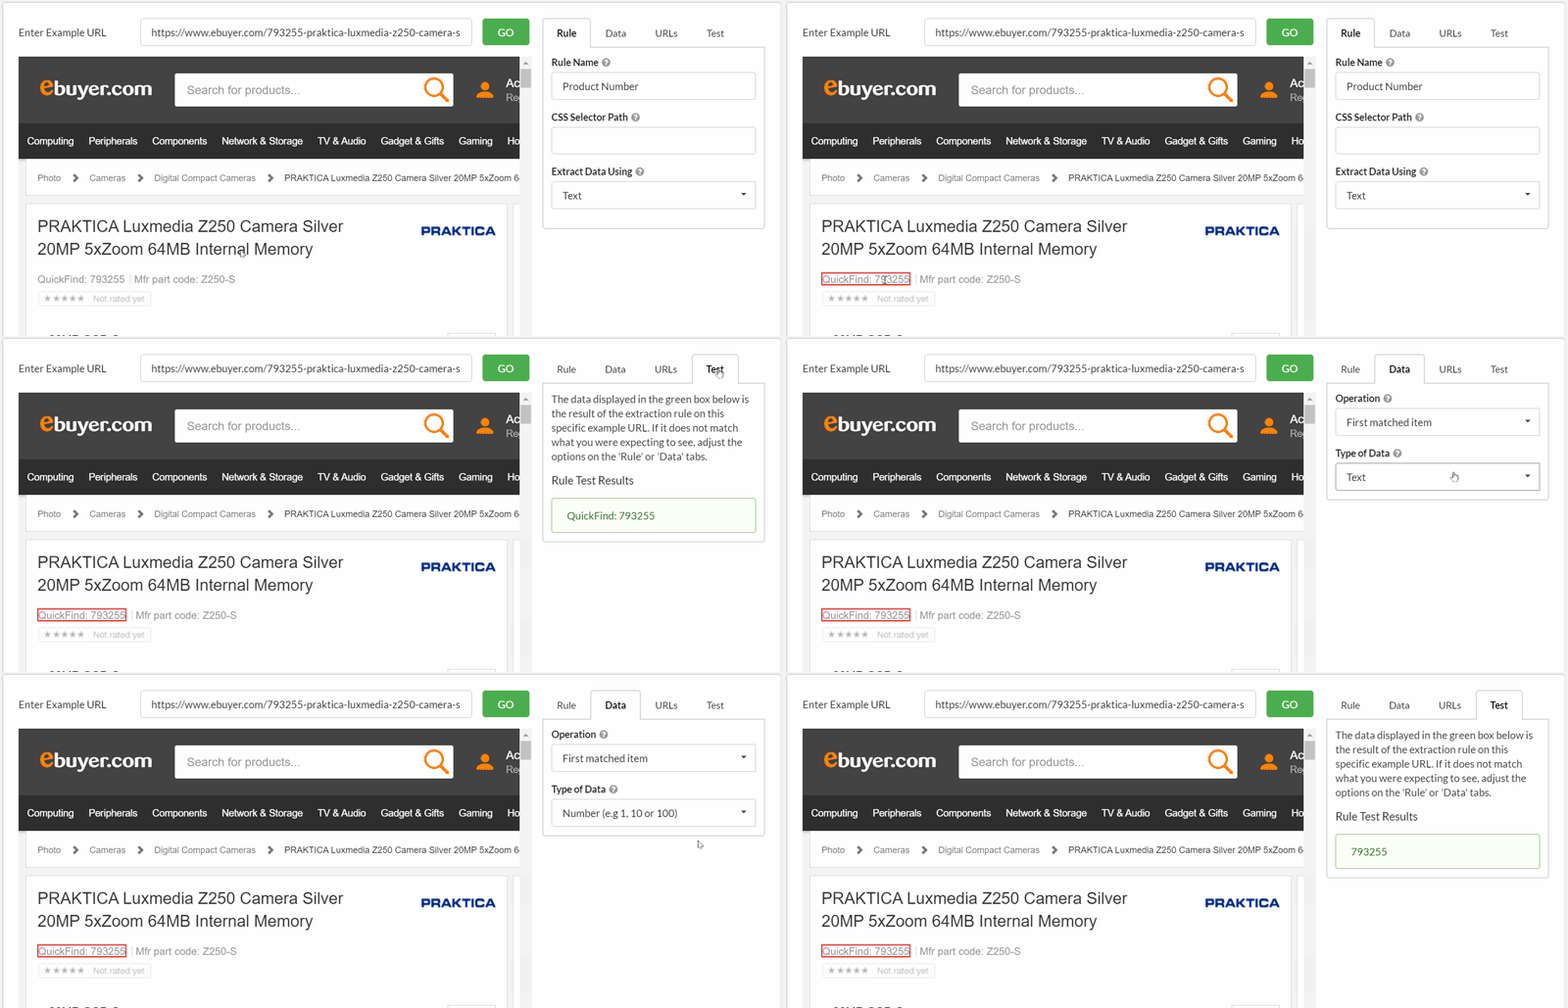
This range of extraction options allow to collect virtually any datapoint on virtually any website. By tweaking the method of extraction, operation or data type options - and constantly testing the setup - you can set Sitebulb up to collect data exactly as you want it to.
By default, Sitebulb will perform the content extraction on every single page on the website. This means you are asking Sitebulb to do more work in terms of processing, and it means more data will be stored on your hard drive once the audit data has been collected.
For most websites - for instance a typical 10,000 page site - there is no issue with this, as the size and scale of the additional resource requirements is negligible.
However, Sitebulb can handle websites with millions of pages, and at this sort of scale you might want to look at reducing the amount of processing work Sitebulb has do while crawling, and perhaps more pertinently - how much space the audit will take up on your hard drive when it is done.
This is what the URLs tab is for. You can enter inclusion or exclusion patterns so that Sitebulb will only perform the content extraction on specific pages.
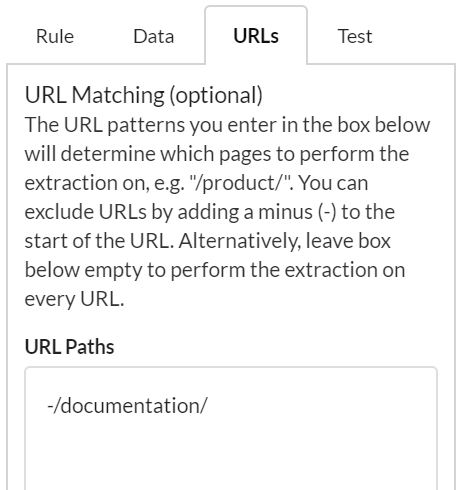
Let's assume we wanted to extract breadcrumb data on pages from our website, but we don't want to perform the search on any of our /documentation/ pages (such as this very URL), we would enter the /documentation/ path with a minus (-) sign ahead of it:
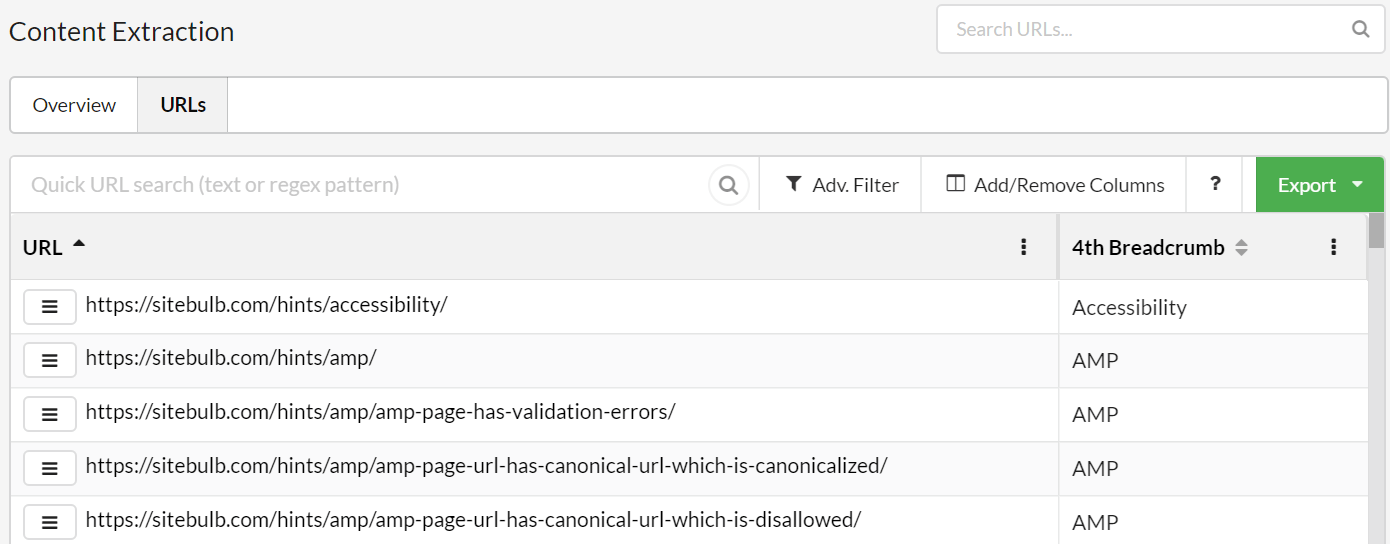
In the results, the /documentation/ pages simply do not appear, so the only pages with breadcrumbs that remain are our /hints/ pages:
We could also do this a different way, by using inclusion patterns instead. If we know that we only have breadcrumbs on /documentation/ pages and /hints/ pages, but only want to look at the /hints/ ones, we can add an inclusion pattern by entering the folder WITHOUT a minus sign:
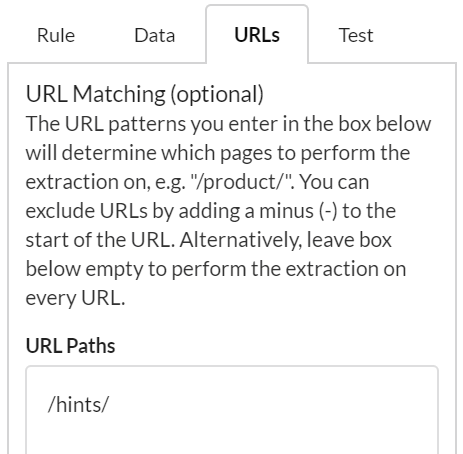
The results for this one show how we are able to isolate the pages we are actually interested in, and only perform the extraction on those pages.
The URL matching works for either the basic or advanced configuration, and can be defined differently for every rule you add - so you can get super specific in your setup.
The final thing to point out is that on some sites, content is loaded in via JavaScript, which means it is not possible to view this content when you do 'View Source.' If this is the case on the website you are crawling, you need to ensure you switch to the Chrome Crawler on the audit settings.

This means that Sitebulb will render the JavaScript before performing the content extraction.