Once your cloud server has been set up, you'll receive an email containing connection details - it will explain how to connect through the web interface and through the desktop application.
Your welcome email will contain the login URL you will need to go to. Simply visit this URL and login with your Sitebulb username and password.

Once logged in, you will be able to access existing audit data and start new projects.
Make sure you are using the latest desktop client, which you can download from here (feel free to enjoy the release notes while you wait for it to download).
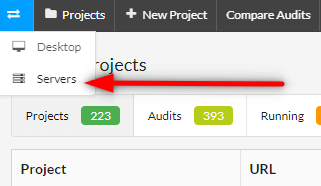
In order to connect to your cloud server, you need to provide the details of the server. Start by heading to the Servers section in the top left and switching from Desktop to Servers:

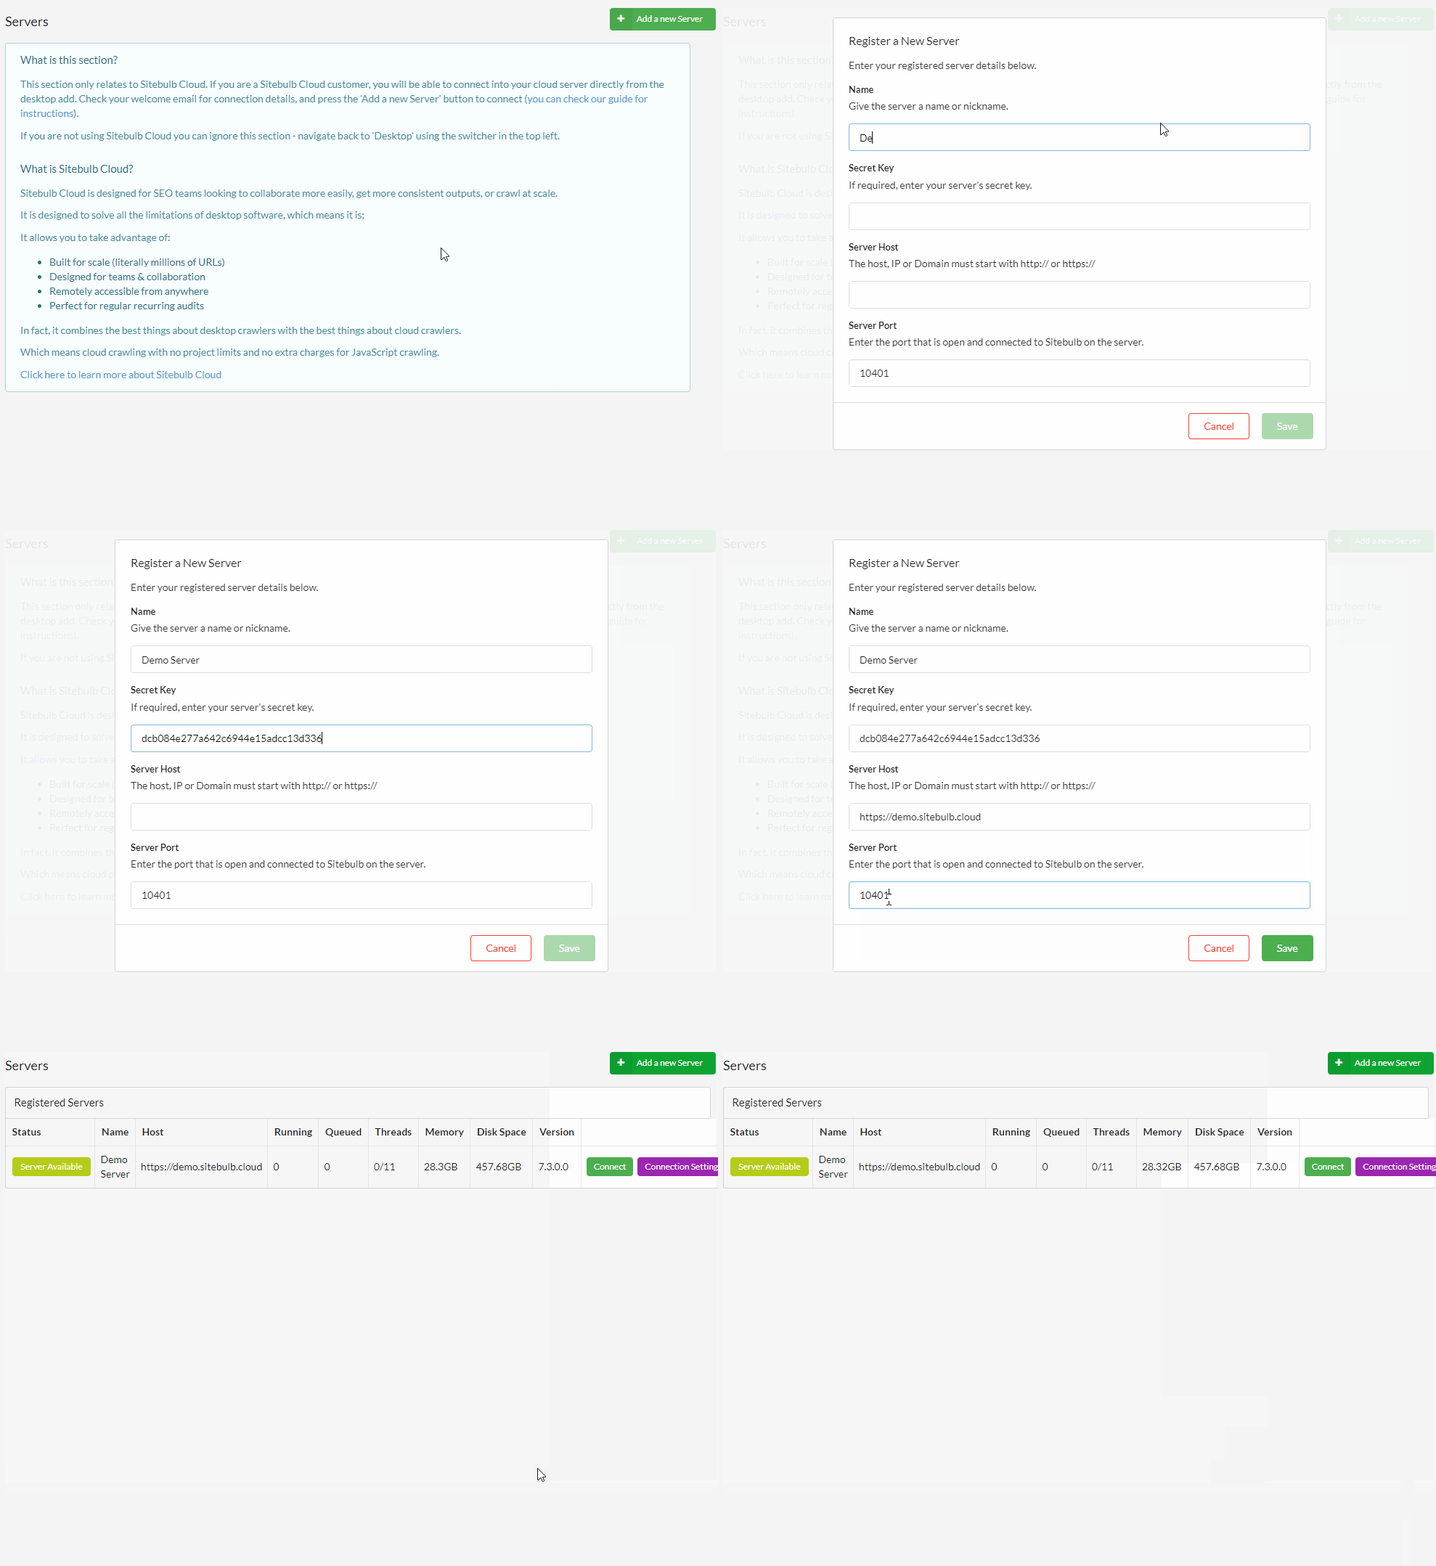
And then click the green button top right to add a new server:

You need to add the server host, port number and secret key. You will get these from within your welcome email, there will be a section that looks like this:

These are the details you need to fill in on the 'Add a new server' panel:

Note: do not leave a trailing slash in the server host URL, otherwise you will get a connection error.
Once you hit Save this will add the server to your list of Registered Servers, and you can Connect to the server by pressing the green button:

This will now switch your local version of Sitebulb so that the data you see in Sitebulb is now actually the data on the server.
You'll see a message at the top of the screen that clarifies you are now looking at audits on the server, and not on your desktop:

Now that you are looking at data on the server, you can dig into any audit on there in exactly the same way you would on your desktop machine. You can even produce CSV exports on the server and save them directly to your desktop!