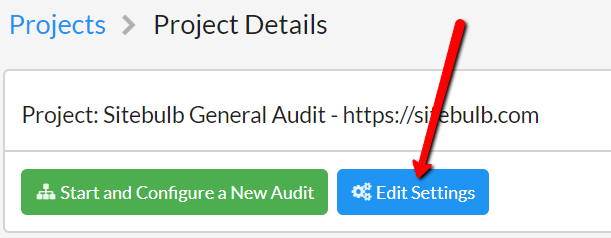
There are two ways to edit the settings for a Project. One is simply to start a new audit. Navigate to the Project in question, then click the green button Start and Configure a New Audit.

This will load a pre-audit on the site, and the audit settings will reflect those from your most recent audit. You can change the settings at this point and audit the site again.
The other option is to edit the settings without starting a new audit right away. This allows you to adjust the settings in anticipation of a future audit you expect to do.
Navigate to the Project in question, then click the blue button Edit Settings.

From here you can simply edit any settings, then hit 'Save' and the Project settings will be saved ready for your next audit.
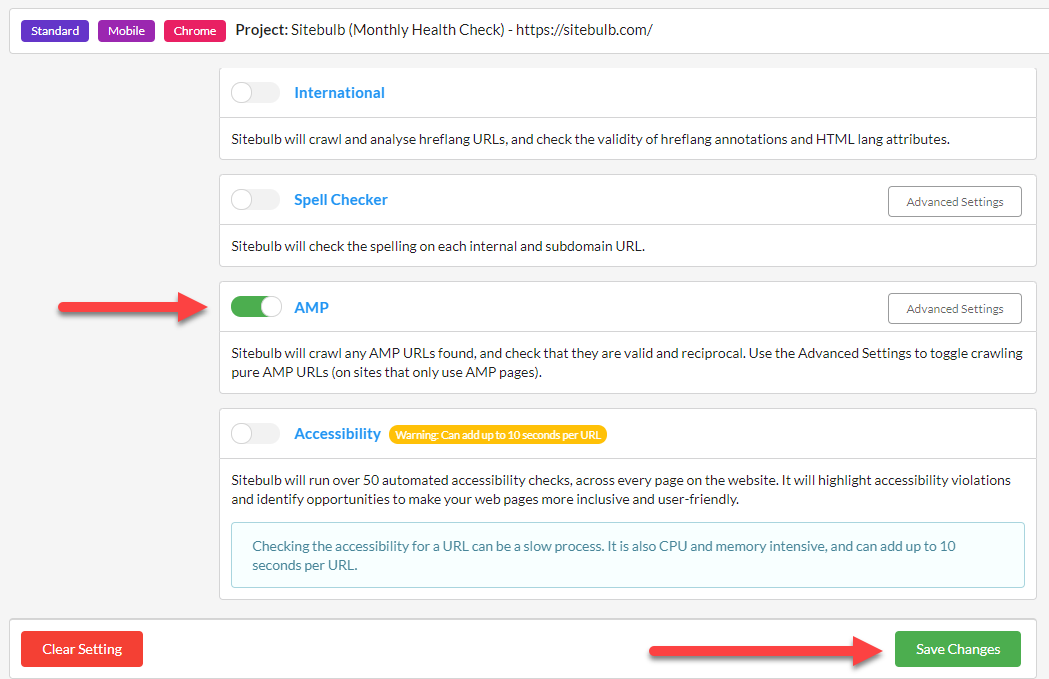
Let's say you have a recurring audit set up to run every week, and your client calls up to let you know that they have unceremoniously implemented AMP. You may now wish to include AMP validation as part of your weekly audit in Sitebulb. By editing the project settings, you can go in and add AMP to the crawl settings, so that Sitebulb will also check this every week.
In order to do this, navigate to the project in question, and hit the blue button Edit Settings and Schedule:

This will open up the familiar 'Audit setup' page, which you can then adjust as required. In this case, all we wanted to do was add AMP, so it is just a case of clicking on the 'AMP' switch and then hitting the Save Changes button. However, you can go in and change any element of the audit setup, including Advanced Settings. Just make sure to hit save!

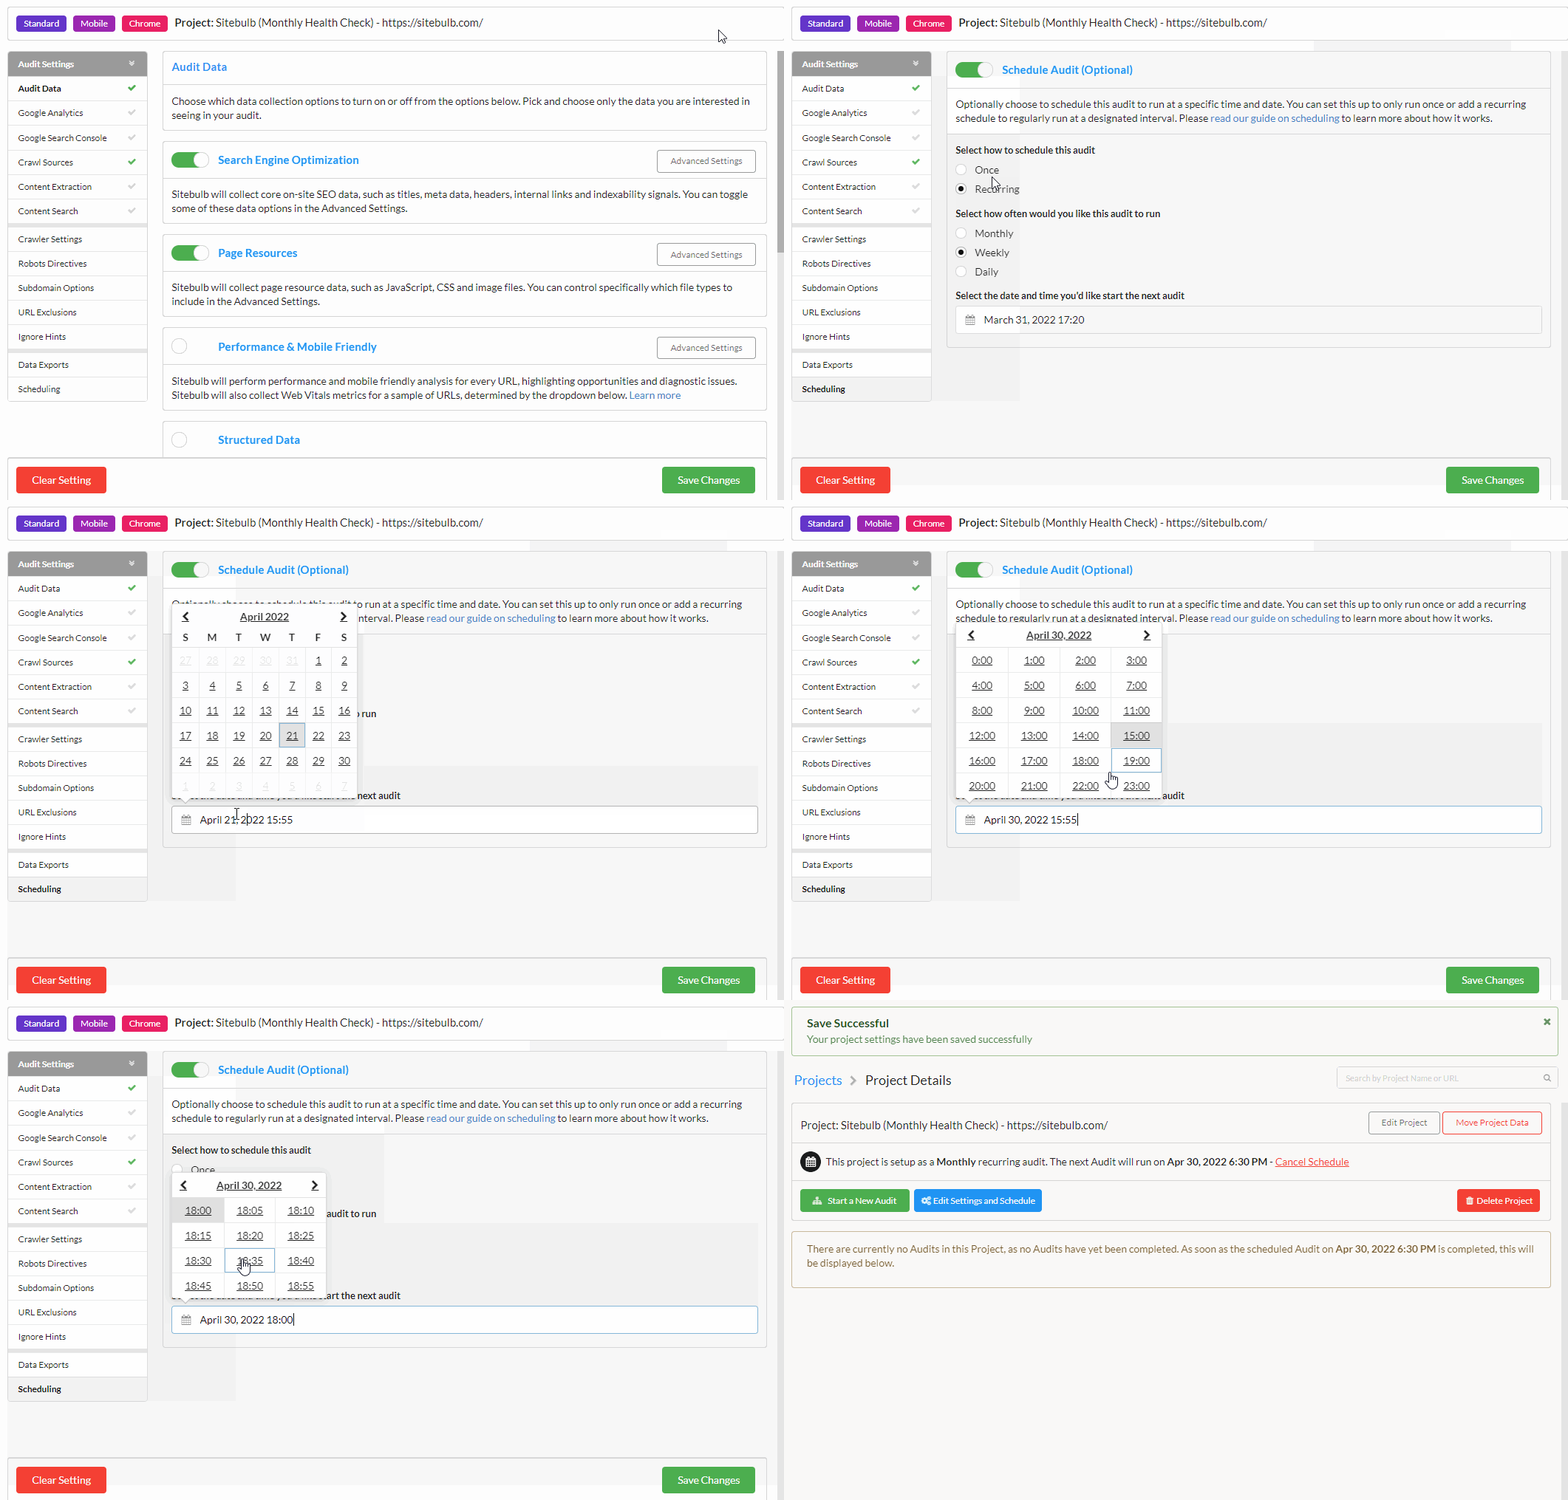
An extension of the above, you can choose to edit the scheduling of an audit as well. Simply navigate to the project, and open up the audit setup page using the blue button Edit Settings and Schedule.
Then, scroll down and press the Scheduling button on the side menu, to open up the scheduling panel. You can change any element of the schedule, including the recurrence interval and when the next audit should run. Make sure to hit the Save Changes button!
