From time to time, you may decide to treat yourself by purchasing a brand spanking new computer (or acquire one by other means...). On such an occasion, it is highly likely that the first thing you wish to do is install Sitebulb.
Before doing anything else, pat yourself on that back for exemplary decision making.
When you first fire up Sitebulb, it will ask you to log in. Use your normal details, and activate your license. In doing so you will deactivate the license on your old machine, but this is fine since you have moved on to the shiny new machine now (this page will give you more details about moving your license to a different machine).
Now, when you go to the Projects page, you will not be greeted with any of your old audits:

This empty Projects screen is because you are on a fresh install on a brand new machine. All the audit data you had on your old machine was stored locally on that hard drive.
Now you are faced with 2 options:
The rest of this article will assume you wish to proceed with #2 above, and will explain how you get your old audit data across from the crappy old machine onto its beautiful new home.
Alas, our journey begins with the decrepit old junkyard that is your old machine. Give yourself a clear 45 minutes for it to fire up, then open up Sitebulb. You may need to juggle the activation of your license again, but this is as easy as clicking a couple of buttons on the 'Your Account' screen.
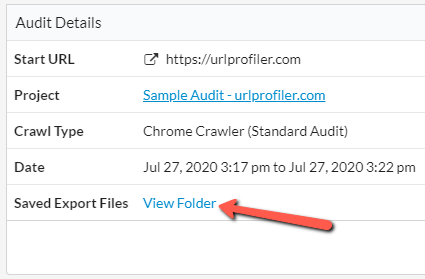
This step involves locating where Sitebulb has all your audit data stored. The quickest way to do this is to open up any audit and click the View Folder button alongside 'Saved Export Files':

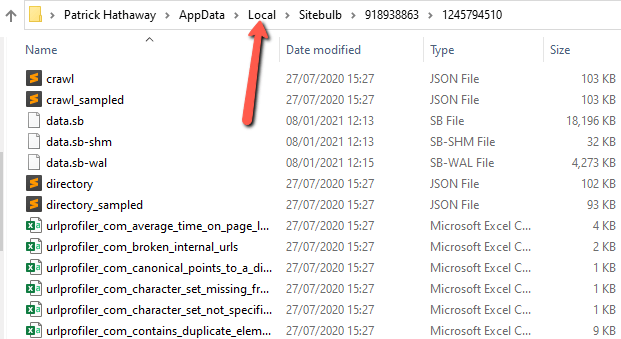
You'll see a folder that looks a bit like the image below. In the file path, navigate up to the 'Local' folder:

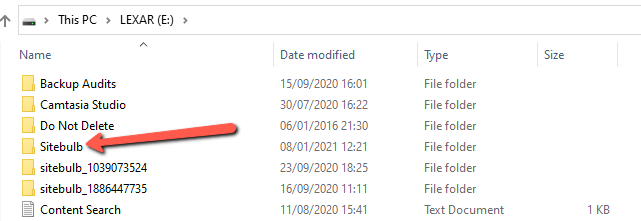
Now you'll be in the 'Local' folder, and you should be able to see a folder entitled 'Sitebulb':

>> IMPORTANT <<
Shut the Sitebulb software down, and make sure it is definitely no longer running. Close it down via Task Manager/Activity Monitor if it is still running. DON'T copy the folder until you have shut Sitebulb down completely.
Then, you need to copy the 'Sitebulb' folder from 'Local' and paste it onto an external drive. In this example, I just used a USB flashdrive:

You could also use an external hard drive, or a file sharing system like Dropbox/Google Drive.
Now you can shut down the stinking pile of trash that is your old computer, and optionally destroy it.
Return to your new machine, and take a moment to appreciate just how much faster and better looking it is than its predecessor.
With a spring in your step, sign back into Sitebulb on your magnificent new machine. Follow the same steps as above in order to find the Local folder, which will already contain a 'Sitebulb' folder of its own.
Don't worry about this, it's just the default folder generated when you install.
>> IMPORTANT <<
Shut the Sitebulb software down, and make sure it is definitely no longer running. Close it down via Task Manager/Activity Monitor if it is still running. DON'T do the next bit until you have shut Sitebulb down completely.
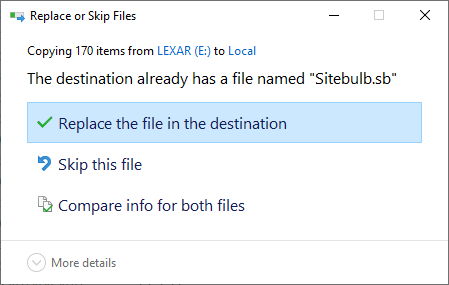
Now, copy the OLD Sitebulb folder from your flashdrive/external location, and paste it over this new one.

Yes, you want to replace the files. This effectively clones what you had on your old machine, and ports it across to the new machine for your further delectation.
Now, when you open Sitebulb up, you will see a perfect scale replica of your previous audits, with all their glorious history, which you can enjoy to your heart's content on your pristine new toy.
Et voilà!
