In some circumstances you may find the need to 'sync' data between two machines.
For example:
While it is not possible to truly sync data using Sitebulb, there is a way to achieve a similar result, by making audit data automatically available in a cloud/network location, that can be picked up by different machines or users.
The way to do this is to make use of the option to saving export data to a custom folder.
This setting enables you to build a more automated workflow where Sitebulb can run audits and then automatically save the export files in a location of your choosing - either on your local machine or in a shared cloud drive that your whole team can access.
You simply pick a location for the exports and/or the audit share file, and then at the end of the audit Sitebulb will save the data there for you.
The most important thing to note is that this is a project setting, so you set the folder location for a specific project - it will NOT automatically set this for every project you create.
You can set the custom save folder either when setting up a new audit, or when you edit the project settings.
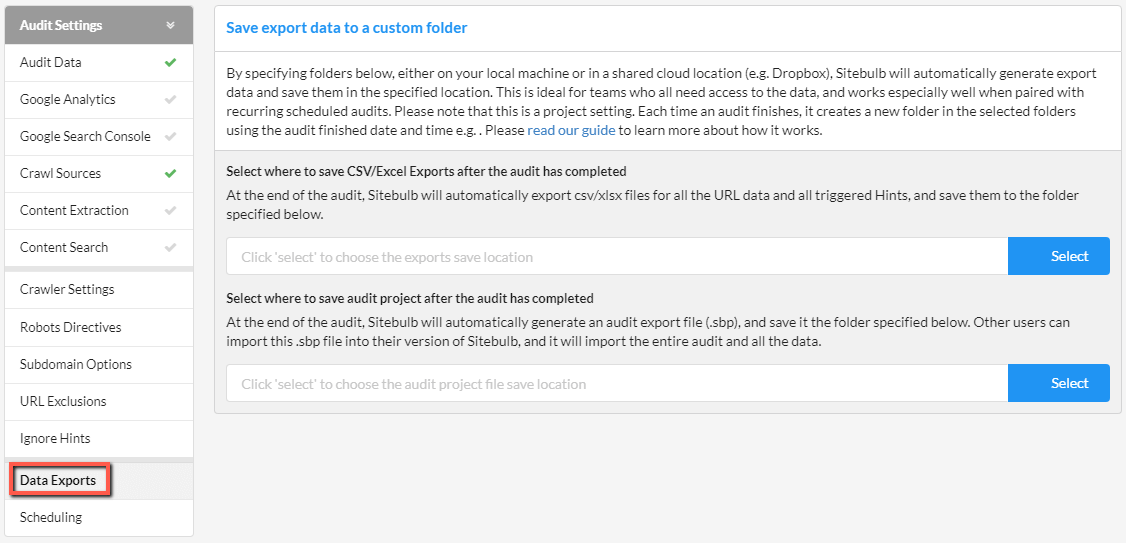
Access the Data Exports section towards the bottom of the left-hand menu when setting up your project.

This page offers two save locations - the first is for the CSV/Excel exports - but we are not interested in that for this use case.
In this case, we want the second option: 'Select where to save audit project after the audit has completed.'
This option relates specifically to the audit project share file (.sbp), which you would normally get by going into the Audit Overview and hitting the Share Audit button.
This file can be imported by any other Sitebulb user, and they would then have access to the entire audit as if they carried it out on their own machine. By clicking Select on the right hand side you can choose where to save audit data to.

You will want to set your save location to somewhere that is accessible to all users who need to sync the data, so this might be a Dropbox file or a network drive.
Once the audit is complete, Sitebulb will generate the .sbp file automatically and save this into the location you specify.
This next part is necessarily manual - on your 'other' machine, you will need to grab the generated .sbp file and import that into your version of Sitebulb.
From the Project screen click the Imported tab. On the import website audit tab click the blue Select file button and this will open a explorer/finder window – go find your .sbp file and click open.
This will now close the file browser window and return you back to Sitebulb – click the green Start Import button. The import window will load up and show you progress; once it finishes you will be able to view your newly imported audit.

While the custom save location works for any audit, it is most powerful when you use it alongside recurring or scheduled audits.
The features combine to allow you to set up fully automated workflows, such as:
Every week, new export files will appear in the shared folder, allowing team mates to grab the new files and build their reports with all the fresh data.